Once you have your idea it's a good idea to make a storyboard. A storyboard is basically a plan of your movie. When doing a google search for a template this was one of the first ones I found which I thought worked well:
http://www.printablepaper.net/preview/storyboard-letter-16to9-2x3
Each box represents each different shot in your movie. You can draw stick figures to represent your actors and write down any dialogue or special instructions. Making a storyboard is to help you organize yourself when filming so it's very personal. Some people might just want to write notes while others might want to draw. Here are some tips that I think are useful to stay the most organized.
- Label your shots by number and then a short description (ex. 01 John in kitchen). You can then use the same title for the clip when you bring it into moviemaker. Make sure the number is first so that it will go in order in moviemaker.
- Clearly mark the characters in each shot. This will make it easier to see which students you need to film at a given time.
- As you film each shot, cross them out on your storyboard. It will make it easy to see what is left to film
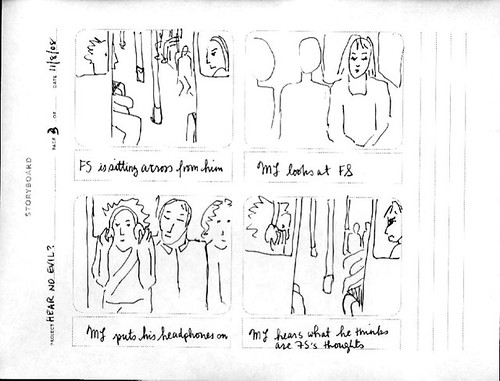 |
| Here is one with pictures and small notes |
 |
| Here is an example of just words. |
Here are some common abbreviations for storyboard descriptions that might be helpful:
WS - Wideshot
CU - Close Up
Pan - Turn the camera left or right
Tilt - Turn the camera up or down
Moving shot - camera follows action
Cut to - switch to
VO - voice over (narration)
SFX - sound Effect
No comments:
Post a Comment